For the past year or so, we’ve been using Git as our version control system. My introduction to the GUIs around Git was SourceTree (although I’ve made an effort to learn the commands) but I have also used poshgit and Git Bash. Recently, we’ve started using SSH keys instead of HTTPS and I had to learn how to set up my repositories with SSH. Everywhere and everyone tells you this is straight forward and it is when the critical path works but when something is wrong, it gets more difficult. A lot of unnecessarily complex documents does not help either. So I’m going to details all the steps that I took in the hope that it could helps someone.
My setup for this task is Git (you can use the embedded git within SourceTree), SourceTree and BitBucket (previously used Google Drive to host my git repositories).
Stage 1 – Generating a SSH key
- Open SourceTree and click on the Terminal icon (this is Git Bash)
- Type the following command in
- ls –all ~/.ssh (this will list any existing ssh keys in C:\Users\\.ssh, this is the default but can be changed when generating the key).
- Next, generate the key
- ssh-keygen –t rsa –b 4096 –C “”
- It will ask you where you’d like to store the files, I accepted the default but you can specify a directory if you wish.
- Then enter a passphrase, I would recommend you provide a passphrase from a security standpoint.
- You should now see this this:
Your identification has been saved in /Users/you/.ssh/id_rsa.
# Your public key has been saved in /Users/you/.ssh/id_rsa.pub.
# The key fingerprint is:
# 01:0f:f4:3b:ca:85:d6:17:a1:7d:f0:68:9d:f0:a2:db your_email@example.com
- There should be two key files id_rsa (private) and id_rsa.pub now created.
Stage 2 – SSH-agent
- Still using the terminal (Git Bash) in SourceTree, type:
- eval $(ssh-agent). There are many ways to start the SSH agent but this is only way it would work for me. It should give you a process id back, something like, Agent pid 1234
- Finally using this command to add the new key
- ssh-add ~/.ssh/id_rsa
- If successful, the output should say that an identity has been created.
- You should never have to type in the passphrase again.
Stage 3 – Added the SSH key to your BitBucket account
- Log into BitBucket
- Select the icon on the top right of the browser and select Manage Account
- From the Security menu, select SSH Key then Add Key
- Add you public key (id_rsa.pub) to the text area and then Add Key again
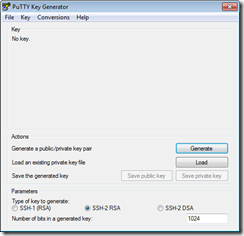
Note, your public key in this file is in a different format from what BitBucket expects. My recommendation for this scenario is to go to SourceTree – Tools – Create or Import SSH Keys. This starts a Putty Generator that has the ability to load existing keys. The generator will then show the public key in a user friendly format to be copied and used within BitBucket.
Stage 4 –SourceTree
In Stage 1, the SSH key was generated and set up for the Git Bash terminal, now we want to take that SSH key and use it within the SourceTree GUI.
- First step is to go to Tools – Create or Import SSH Key
- Load your existing private key in.
- Click on “Save Private Key”. This has to be saved in the Putty .ppk format. I would recommend that you didn’t save this private key to the .ssh folder in case of conflicts between two keys.
- Next is to launch the SSH agent – Putty comes with SourceTree.
- Make sure Pagent is running ( little computer with a hat on sitting in your windows tray).
- Add the key to the SSH agent by right clicking on Putty Pagent and selecting “Add Key”. It is Pagent that stops the user from entering the passphrase all the time by holding key and making it available to SourceTree.
- A further step is to add the .ppk key to Tools – Options – General – SSH Client Configuration.
That’s it! I was all around the houses trying to fix various errors and configure. Some of the problems I faced were:
- Permission denied (public key). I believe it was a combination of errors on my part. One, I had created too many key files in the .ssh directory and it didn’t know what one to choose. Second, I hadn’t set up SourceTree correctly. The SSH key had to be a .ppk key and not the id_rsa key, which I’d generated.
- Could not open a connection to your authentication agent. I believe this was down to me changing from Putty to OpenSSH. OpenSSH just never launched, no wonder it couldn’t get a connection.
- It took ages to clone a repository. SourceTree GUI doesn’t give a lot of feedback with what is going on, not like Git Bash. I thought it wasn’t working.
My tip would be to test the connection using “ssh –T git@bitbucket.org”. This command with provide decent feedback if you have or haven’t authenticated. So open Git Bash and type this in.
A good topic for debate is why go to all the trouble of using SSH keys? Why not, use HTTPS and cache you account details in winstore?
Update:
Discovered this morning that if you shut SourceTree down, if you use the Git Bash terminal, you will need to repeat Stage 2.
References


